Just incase for those who didn't know! We have moved to : www.myrusticsimplicity.com
come on over a join our page!!!
Wednesday, July 3, 2013

Wednesday, April 10, 2013
A Little Coffee to Go With That Beer

Mom and I have been exploring Great Falls MT for about 2 months now. We have finally found a place to sit back, relax, and enjoy a cup of joe. Besides coffee, they also have amazing crepes (we get ours gluten free) and a lunch/dinner menu... Oh, and you can't forget the beer!


On the other side of the coffee haus they have a brewing company. So if your not in the mood for coffee and crepes you can sit back relax and enjoy a good ol' beer! We suggest waiting until at least lunch time for the beer! But honestly who's judging?!

We just love the atmosphere here. While it being very warm, cozy and inviting; it still has this "we are cool and a little funky" charm that I admire. There is this beautiful gas fire place separating the coffee haus and the brewing company. It's a great spot to sit and enjoy a good book or converse with friends!

Chit chat, laughter and an occasional name being called to the counter for food, fill the room. As I sit here and write this, there are sisters to my right playing cards and drinking coffee. A college student (I am assuming) sitting by the fire, studying The Bible; and a few others talking amongst themselves and enjoying each others company.

It's places like this we enjoy finding in a small town. In my personal opinion it's way cooler than generic Starbucks and a lot more relaxing. It has that rustic simplicity that we love! I foresee myself spending a lot of time here whether it be, having coffee with mom or an afternoon out with my husband. Maybe even the occasional "date" with my dad enjoying a good local beer!
Tuesday, April 9, 2013
Choco-Nana Oat Cookies
Mom created a recipe of her own. It's a simple easy treat for everyone. They are delicious cookies!

3 mashed banana's
2 1/4 cup oats
1/2 cup no sugar added apple sauce
1tsp vanilla
1/4 almond milk
1/4 cup semisweet chocolate chips (60% coco) We used Ghirardelli
Bake at 350 for 20 minutes exactly. It makes 1 dozen!
Fresh Eating
Over the past year and a half, I have embarked on a life changing journey. My mother and I both have been trying to become more "simple" when it comes to food, and our day to day living. We love the idea of going back to "the way it used to be". Homesteading has been on my mom's mind since... well since I can remember. One day we will be true homesteaders. But as for right now we are growing a garden, buying our eggs from local farmers and trying to get our meats from local butchers. We have also taken up making our own laundry soap and other house holder cleaners. Some of these new endeavorers have stuck with us and others have slipped away...
The past week my mom and I noticed we slipped off the healthy food track and have become way to dependent on candy, bread, and everything bad! After having a baby and the holidays all falling together we had drifted off into candy land and couldn't find our way back to reality.
So after some deep thought and research, we are getting back on track. We found a local "fresh food" market (not to be mistaken for an organic store, they tend to be over priced). We got some basic healthier versions of our favorite food such as; B grade Maple syrup, coconut oil (instead of crisco or other shortenings), gluten free breeds and flours (Mom found out she is allergic to wheat and we are now trying to avoid gluten). We also bought a lot of fresh veggies and fruits since our garden wont be ready for a few more weeks.

Our goal is to cut out overly processed foods and to cut back on sugars. We read a while ago that food is medicine for the body and we couldn't agree more! We have learned over the years that food can either make you feel really good, really bad or really tired! It's all about what you put in your pie hole AND how much.
Mom and I are still learning and tweaking this life style to meet our needs! But we hope you can grow and learn with us!
Here are a few pictures of our experiences this week!

Scrambled tofu (olive oil, salt, garlic and cumin) with gluten free toast.

Fresh kale, ripped up and baked with olive oil and sea salt!

Quinoa Bars! I will post the recipe soon, I am going to play around with it one more time and see if I can make it even better.
These are just a few interesting recipes we found and played with! There will be more to come!!!!
Thursday, April 4, 2013
Oh How a Garden Grows
After a year break from almost anything productive, we have decided to grow a garden! My mother does this annually, but had a rough time growing a garden in Texas. It usually only lasted a few weeks before the heat had its way with it!
So, this year we are taking advantage of the awesome weather here in Montana! Our first garden of many in this beautiful state.
Yesterday we decided we would start as many veggies and flowers as we possibly could. Mostly tomatoes, cucumbers, squash, and a few melons. The rest of the seeds need to be planted directly into the ground (root plants; carrots, onions, beets, to name a few!). We will plant those when we transplant the seeds we started inside. We are also growing peas inside around the kitchen window! I am extremely excited to try this out. My mom came up with this brilliant plan. (I will post pictures as they grow.) From what I understand, we will place a few "tacks" around the windows for the peas to hold on to. Again, I am so excited about this. I love bringing the outdoors inside!

Here is our collection of seeds! We mostly use heirloom seeds. If you look closely, you can see our potatoes and burlap sack in the background. Another project we will keep you posted on. It's one of our favorite ways to grow potatoes.

I just loved the look of the Forget Me Not seeds. They almost looked as though they were wet!

My son and I "sewing seeds". He had a blast putting the seeds in the dirt.
We hope you stick around to watch our garden grow!
~ Simplicity ~
Wednesday, April 3, 2013
Its Been a While!
SO... It has been a while (to say the lest) since we last did a post on our blog! A LOT as happened in the last year.
One, Jessica and her husband had a beautiful little girl!

Two, we all made a big move to MONTANA! Talk about change!

We are all starting new adventures and we hope you will join us on this incredible journey!
Thursday, April 26, 2012
Aquarium
My son and I recently took a trip to the Charleston Aquarium with a friend of mine! Oh what a blast we had. My son LOVES fish and he was hesitant to leave after the short walk through. I was a little bummed out because some of the aquarium was under construction! But I have been assured that when the aquarium is fully functional it's a lot of fun. So, I will defiantly have to go again! Here are a few pictures of our adventure!

As soon as you walk in, there is a large tank full of colorful fish! He didn't realize there where more fish to see and objected to leaving this spot!
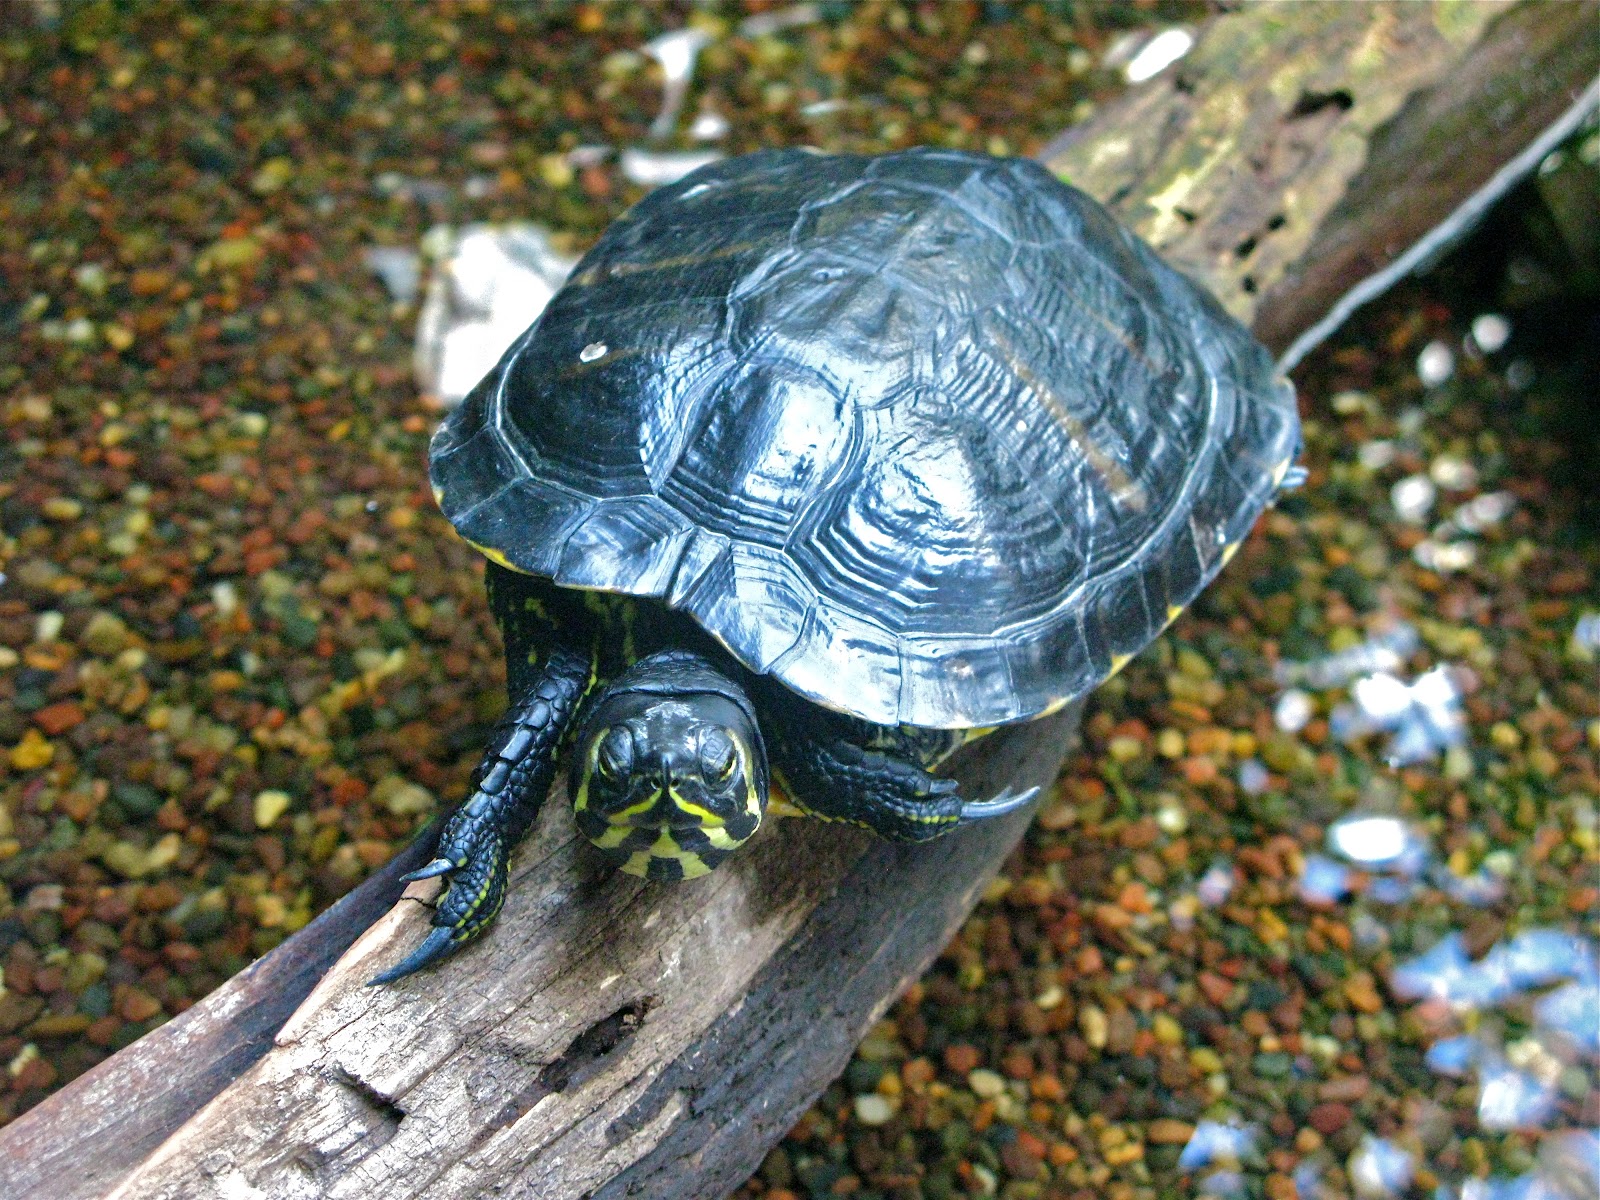
He got to see his favorite! Turtles!

This was fun to see! Bradley was blown away that someone was swimming with the fish!

Stingrays!

And last but not lest, he got to touch a starfish! He was pretty brave and really enjoyed it!
I have a lot of fun trips planned out! One of which I will be visiting my family in Texas for my fathers homecoming from a deployment! I can't wait to share my adventures and projects with you all!!!
Banana Bread Muffins

My Husband LOVES banana bread! I am always making it! He will eat a loaf in a matter of minutes, if I let him! SO, to try and slow him down, I decided to take my normal banana bread recipe and pour it into a muffin pan! I am all about individual serving sizes! I love this recipe! The banana bread turns out supper moist and nice a fluffy! I hope you all enjoy!
Recipe:
1 cup sugar
1/2 cup canola oil
2 eggs
1 cup (about 3 banana’s)
mashed ripe bananas
1/2 cup sour cream
1 tsp. vanilla
1 1/2 cup flour
1 tsp. baking soda
1/2 tsp. salt
Turn heat onto to 350. I am not going to lie, I just mix everything together!
Grease and flour a loaf pan. This makes about 1 large loaf or 2 medium loafs. If you do a large loaf cook for about 50-60 min. For a medium cook for about 45min or until a tooth pick come out clean! For a muffin pan it will only need about 15-20 min. I didn't track the time when I made them, so keep an eye out!
I hope you all enjoy!
Peanut Butter No-Bake Cookie

Hi everyone!
Sorry it has been a while! A lot has been going on these past few weeks and I haven't had a chance to blog! So, I thought I would bring back the blogging with a simple, yet OH-SO-YUMMY no-bake cookie!
I know no-bake cookies are rather simple and I am sure most of you have one memorized by now! I know I have a few! But this is a simple twist from the normal chocolate no-bake cookie.
Just PEANUT BUTTER!
You will need:
1/4 cup Butter
1/2 cup Milk
2 cups Sugar
1 cup Peanut Butter
1 teaspoon Vanilla
1/2 teaspoon Salt
3 to 4 cups of Old Fashion Oats
Directions: In a medium to large sauce pan, bring Butter, Milk and Sugar to a boil. Let boil for about a minute. After it boils remove from heat and quickly add Peanut Butter, Vanilla and Salt. Let the Peanut Butter melt into the mixture. Add Oats and then place on wax paper or a cookie sheet. Let cool down for about 30 min. You can put them in the refrigerator if you like!
Enjoy!
Tuesday, March 20, 2012
Going North
My family and I spent the past week traveling up the East Coast to spend a lavish weekend at the Oheka Castle to celebrate our friend's, Zach and Sarah's, wedding! (Robert was a groomsmen and Bradley was the ring bearer!)
Our first stop was in Raleigh NC, to visit my husband's Grandparents! We took our son Bradley to Pullen Park, where they have a carousal, train ride, and kiddie boats! It was a wonderful experience for us all!


Our next stop was Washington D.C. We stopped there to meet with the groom and spend a day walking around down town! We had a BLAST!

After D.C. we went to NYC. What a shock it was! We have been in the south for a while and we were not ready for the hustle and bustle of the city! But, we got to see some pretty neat sites and some iconic buildings! over all we had a wonderful time!

Our last stop was the Oheka Castle for the wedding extravaganza! It was AMAZING!

The wedding was beautiful and the bride was stunning!

The reception was a blast and the food was amazing!
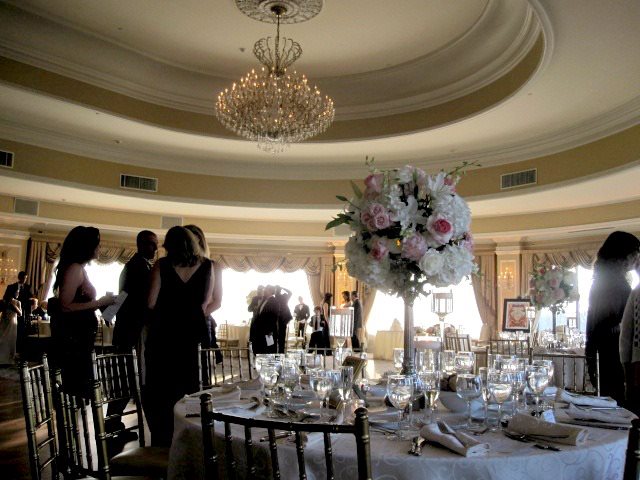

Bradley had a wonderful time dancing the night away with his momma!

And my husband and I clean up pretty well, if I don't say so myself!

All in all, we had a wonderful time on our little get away! We saw new places and met new people! We are so thankful to Zach and Sarah for letting us be a part of their wedding! We had a wonderful time and we are extremely happy for them!
Congratulations to Zach and Sarah! We love you both!
Monday, March 12, 2012
Tip of the week 03-12-12
So, I recently went to stay with my mom and one day while helping do dishes, I noticed she kept all of her sponges and scrub pads cut up in a dish! I thought this is brilliant! I never use the whole sponge or scrub pad anyways! So as soon as I got home I did the same! It has saved me money and time!

Another great tip is: at the end of the night when you are finished with your dishes, rinse out your sponge or scrubby really well and place it in the microwave for a minute! It kills the bacteria and dries the sponge to keep it from stinking! I hope you enjoyed this tip of the week!!!
Here is a picture of where I keep my sponge and scrubs. The dish next to it is where I keep my dishwasher soap!!!

Sunday, March 11, 2012
Easy Spring Wreath

I wanted to make a spring wreath that was CHEAP, but looked nice!
So I went to Michael's to see what I could find! I bought just your normal $4.99 stick wreath form.
Then I found 5ft spring garland on sale for $3.50 ($6.00 regular price) I bought 4!
I also had a 40% off one regular price item, so it was used on my wreath!
Anywho, all you have to do is wrap the garland around the wreath! The garland has wire in it making easy to twist the ends around the sticks making it stay in place! No glue or anything! This way it can be interchangeable through out the year!

I hope you all enjoy the wreath as much as I do! Get out to your craft stores and make something!!
~Simplicity
Wednesday, February 29, 2012
Washer and Dryer Covers

I have wanted to make these for a while now! But, I have had a few mishaps with the washers a dryers I owned and they had to be replaced! So now that I have my new washer and dryer it was finally time to tackle this task! I got the idea from my mom. Who, like me, HATES messes! These covers really help eliminate scratches, spills and whatever else might try and take a whack at your washer and dryer!
What you will need:
2 yards of fabric
2 towels
Thread
and a sewing machine!
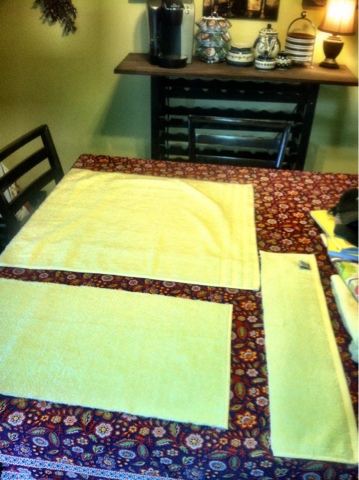
Now I just measure my stuff by eyeing it and it usually works out. But you can measure your washer and dryer and figure out what size you will need to cut your towel!
I cut mine into 3 pieces. The bigger one on top is the width and then the bottom piece is for length and the strip is to help with the "length piece".

You will cut the strip to be the same length as the "bottom" piece and sew those together first!

Then you will sew the "top" to the bottom, that has now been altered, so both pieces are the same size length wise!

Here id an idea of what it will look like win it's all sewn together!
Once the towel is the size you want it. Cut out the fabric. You shouldn't have to cut the fabric into a bunch of pieces. It should just be one piece. You will lay the fabric on top of the towel and pin it together . Make sure you sew it with the towels pretty side facing the pattern on the fabric (the picture above shows what side of the towel and fabric that should be facing each other.) You are sewing it inside out, and then you will turn it right side out when finished.
When you are sewing the towel and the fabric together make sure to leave a opening to where you can turn
your cover right side out!

Once its sewn and right side out you can add a border to your cover! Its really simple! Just sew along the inside about, a inch and a half. Sew all the way around! Thats it!
Don't forget to hand sew the opening you left to pull your cover right side out!!!
The Square Table Cloth
My husband and I decided to buy one of those square pub like tables that are so hip right now. Of course, this was not knowing I would NEVER be able to find a table cloth that fits it! So, to rebel against this "no square table cloths" extravaganza, I'm taking matters into my own hands! I am altering a oblong table cloth I found at Williams Sonoma for $20.00! It's absolutely beautiful and has that pop of color I need in my kitchen! Here's what I did:


First: I folded up the longer edges to meet in the middle.
This way I could keep everything even without using a ruler or measuring tape!

Second:
I brought my fold back, trying to make sure it was all even. I then pinned down my fold.

Here is a close up of the fold. It didn't match up perfectly, but I didn't mind!

I then sewed along the folds. There will be two folds on each side, one one top and one underneath. I went ahead and sewed along both folds because I wanted to add some depth. But, you don't have to sew along both folds if you don't want to!
I now have a beautiful table cloth, that only coast me $20.00 (because it was on sale!) and it fits perfectly on my square table!
Friday, February 17, 2012
Home Made Egg Rolls and Sweet and Sour Chicken
This is one of my FAVORITE dishes my mom makes! Its so yummy!

For the Egg Rolls:
2 lbs of ground beef or turkey browned with 1/2 chopped onion.
Brown the meat and onion together and then place aside in a dish.
Then:
2 bags of slaw and 1/2 head of chopped cabbage.
Mix in 2 cans of mixed veggies ( she uses the one with baby corn and sprouts in the Asian section.)
Steam the cabbage and slaw mix in the same pan you browned the meat and onion. Add 1/4 cup of water, 3tbs of soy sauce, salt and pepper and one or two dashes of red pepper and 3tbs of sugar.
Steam til done then add the beef and onions back in the pan.
She usually wraps the mixture in egg roll wrappers, (you can find these at any grocery store) But her store was out. So, she used wan-ton wrappers in the picture!
You will need to wet the edges of the wrappers to make them stick together.
add about 1tsp or more of the mixture and roll up if using a egg roll wrapper. If using the wan-ton wrappers add another sheet and roll the edges.
Deep fry them for about 4 minutes on each side!
Sweet and Sour Chicken:
1 (8 ounce) can pineapple chunks, drained (juice reserved)
The juice of one orange
1/4 cup cornstarch
1 3/4 cups water, divided
3/4 cups sugar
3/4 cup brown sugar
1/2 cups distilled white vinegar
8 skinless, boneless, chicken breast halves- cut into 1 inch cubes
2 1/4 cups self-rising flour
2 Tbs vegetable oil
2 Tbs cornstarch
1/2 tsp salt
1/4 tsp ground white pepper
1egg
1 1/2 cups water
1 quart vegetable oil for frying
Directions:
In a saucepan, combine 1 1/2 cups water, sugar, vinegar, reserved pineapple juice, and juice of one orange . Heat to boiling. Turn off heat. Combine 1/4 cup cornstarch and 1/4 cup water; slowly stir into saucepan. Continue stirring until mixture thickens.
Combine flour, 2 tablespoons oil, 2 tablespoons cornstarch, salt, white pepper, and egg. Add 1 1/2 cups water gradually to make a thick batter. Stir to blend thoroughly. Add chicken pieces, and stir until chicken is well coated.
Heat oil in skillet or wok to 360 degrees F (180 degrees C). Fry chicken pieces in hot oil 10 minutes, or until golden. Remove chicken, and drain on paper towels.
When ready to serve, put pineapple chunks, and cooked chicken pieces on a platter. Pour hot sweet and sour sauce over top.
Kids Owl Pillow

I have been wanting to make my son something special from "mom" for a while now! SO I finally came up with an idea! An owl pillow for my little guy!
I didn't have a patter to go off of, I just kind of winged it!
If you want to give this owl a try please do! It isn't too hard and I have a few pictures to help you out!
Maybe later down the road I will draw up my own pattern to share with you all!
Here is a very messy "How-to"
I used felt for my owls head. I drew a out-line of how large I wanted his head to be.
Then with my striped fabric I lined up the bottom and drew an outline of his body.
I then cut the pieces out and pinned the top to the top and the bottom to the bottom leaving what would be the "middle" of the owl open. You can go ahead a sew the top and bottom. But do not sew them together yet.
Next I cut out the wings!

Here you can see the "pattern" of the wing! When I cut out the wing my fabric was folded
in half and in half again. This help with
straight lines.

~I don't have a picture for this but I also cut pieces of felt to place in between the wings so that they would be a little more stiff~
Once I had all the wings cut out and sewn, I placed my smaller wing on my larger wing and sewed them together on the machine.

Once the wings were together you sew them on to the "head" of the owl.
I didn't have a specific place to put them I just eyed it and put the wings on the owls sides.
When you sew the wings to the "head" you want to sew them to the outside of the owl and you want the wings to be pointing up to the ears.
Once the wings are sewn on you will turn the top back inside out and tuck the wings in to the ears.
You will then pin the bottom of the owl to the top of the owl. You will want to leave about 1 1/2 inch opening so you can turn you owl right side out and stuff it.
Once its all sewn, except for the 1 1/2 inch opening and you have it right side out. You will sew on the eyes and mouth.
Once that is done stuff the owl and sew up the 1 1/2 opening.
Its really simply and I hope my Messy directions make a little sense! I am making another one soon and I will make sure to draw out a pattern and make it available!
~Simplicity!
Subscribe to:
Posts (Atom)